The world currently runs on digital technology, people, businesses, organizations, etc., People from various parts of the world are hiring the services of thousands of freelancers in Africa,
According to my research, GeegPay is among the best Barter substitutes now that Barter has ceased operations in Nigeria that is why we list cheapest virtual dollar card in Nigeria.
As a freelancer in Africa, you can use GeegPay to create virtual bank accounts in USD, GBP, and EUR that you can use to accept payments from many nations.
Why did flutterwave discontinue its use of virtual dollar cards?
Barter virtual dollar card is no longer offered by Flutterwave.
Barter has stopped creating virtual cards as a result of changing its card partner. According to the statement it provided to its users. Further research reveals that the alleged card partner goes by the name Union54. According to rumors, the majority of African fintech applications that used Union54, including Eversend, Busha, GetEquity, Klasha, and Payday, they have stopped offering virtual cards.
What is Virtual Card?
A virtual card is one that functions exactly like a regular credit or debit card but is not an real one. It uses an online account that functions similarly to a bank account. You can use virtual cards to access your bank accounts and make transactions just like you would with a physical debit or credit card, but without having to carry about the physical card. These cards are only available through an app, so you can’t use them for in-person purchases, but they work great for online purchases. Some virtual cards have cashback programmes as well, letting you get incentives for making regular purchases like groceries or utilities.
This article will walk you through the process of setting up and verifying your GeegPay account step by step.
Overview of GeegPay.africa
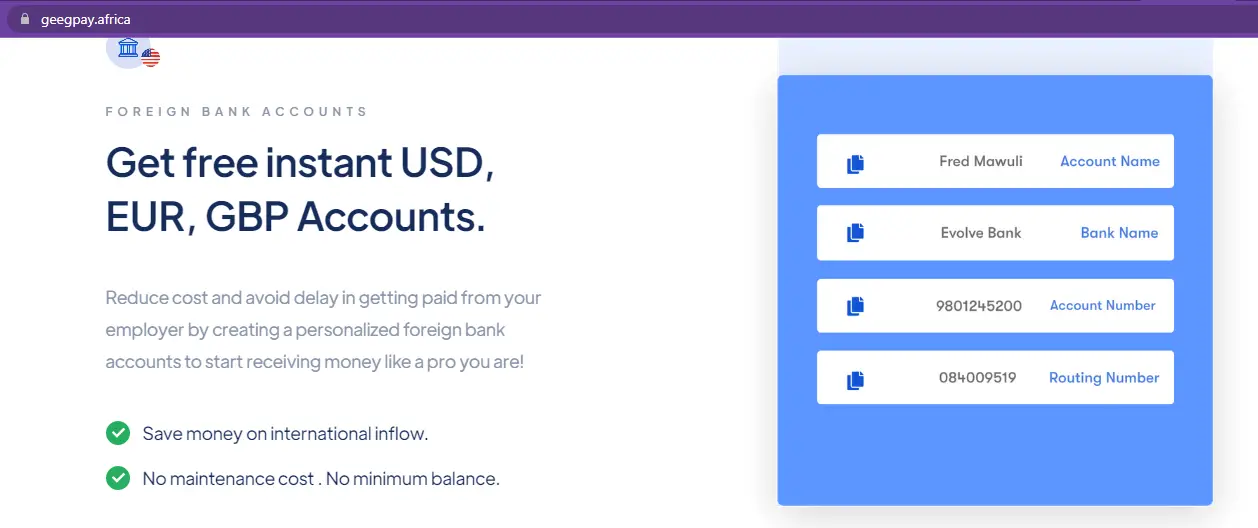
cheapest virtual dollar card in Nigeria
GeegPay is a platform that acts as a global bank account and credit card provider and it is made to make things easy for consumers to open an account in just a few minutes.
Users can easily receive a virtual card with the help of this account. Geegpay has some incredible features, one of which is the ability for users to connect to the internet and access their accounts from anywhere in the world.
Additionally, Geegpay offers a wide range of banking services, including mobile and internet banking as well as other associated goods.
Geegpay is a smartphone application that enables users to quickly create virtual foreign bank accounts in the form of USD, EUR, or GBP and use them to accept credit from foreigners.
Additionally, Geegpay has partners in more than 50 banks in more than 30 countries as of the time of writing.
It is among the best platforms for individuals or independent contractors who want to register a foreign bank account because of these advantages.
Users of Geegpay can instantly convert foreign currencies at the best rates. (Rate on the black market.
Every user can use this to convert international currencies such the US dollar, British pound, and euro to their home currency.
Users can withdraw money from this section to their various banks in Africa.
Note: You can withdraw money from PayPal directly to their USD bank account, it has been confirmed.
Additionally, there are no additional fees consumers will pay while opening a new Geegpay account.
This is one of the top platforms that can perform even more tasks than barter.com, provided you don’t have any trouble setting up an account.
Steps on How to Get Your Virtual Dollar Card with GeegPay (New Barter Alternative)
We will outline every step you must take to create and validate your GeegPay account in this section.
The graphics will make it easier for online learners to understand the information we are presenting.
The procedures to create and properly validate your GeegPay account are listed below.
Step number 1: Go to GeegPay
Go to https://geegpay.africa on your PC or mobile device’s browser.
To access the page where you can create your account, click “Open an Account” in the top right corner of your screen.
Step number 2: Set up a Profile
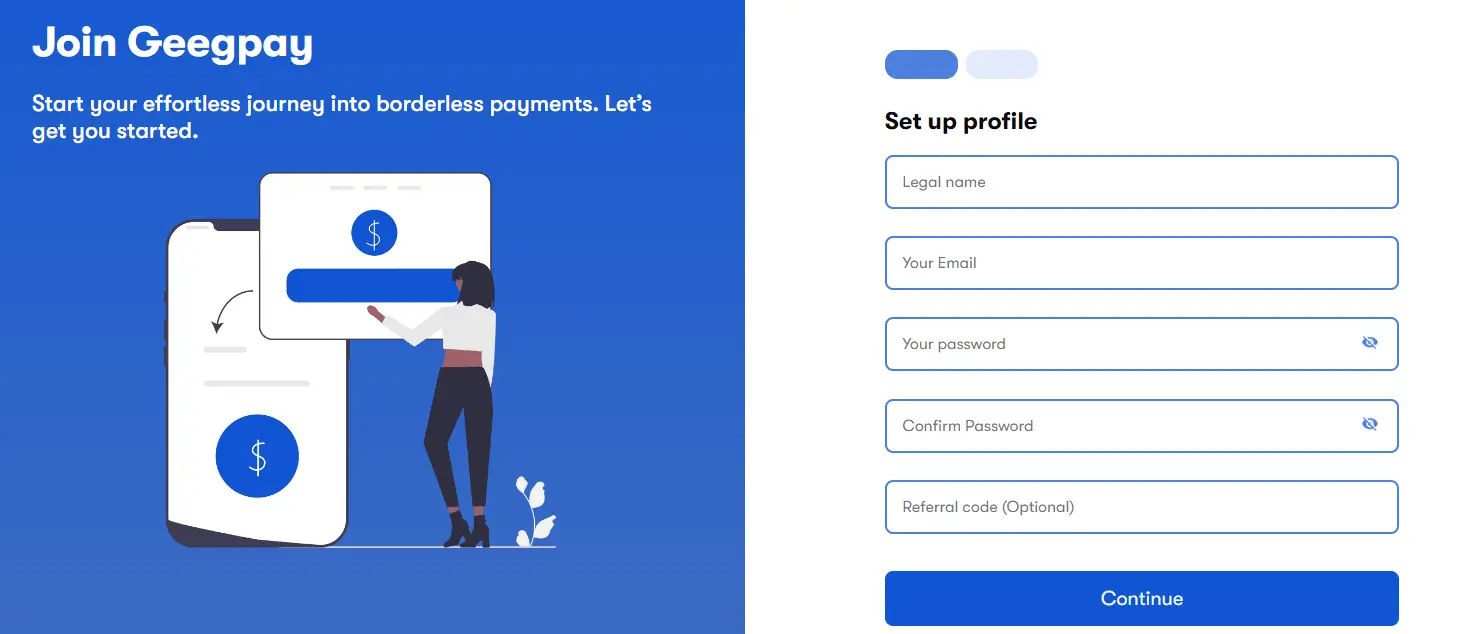
cheapest virtual dollar card in Nigeria
Immediately after selecting “Open an Account” on the homepage,
You will be directed to another website where you may create your Geegpay profile.
Fill out the form completely, making sure to include your FULL NAME, EMAIL ADDRESS, PASSWORD, and referral code (use “nnabjo1118” without the quotations).
We advise that you carefully read Geegpay’s “terms and privacy policy” (as displayed in the above image) before pressing the “proceed” button.
Step number 3: Email Verification
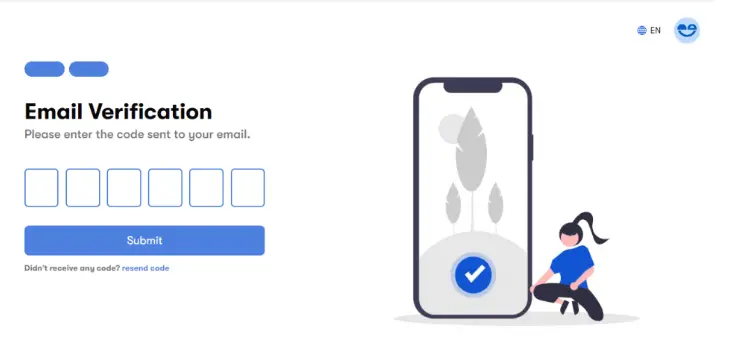
cheapest virtual dollar card in Nigeria
Geegpay would like to confirm the email address you provided in step number 2 above at this point.
After that, you need to enter into your email account and wait a short while for Geegpay to send you the 6-digit code.
We advise you to click on “resend code” under the “submit” button on your current webpage if you did not receive the email within a few minutes.
Step number 4: Welcome to your Geegpay Dashboard
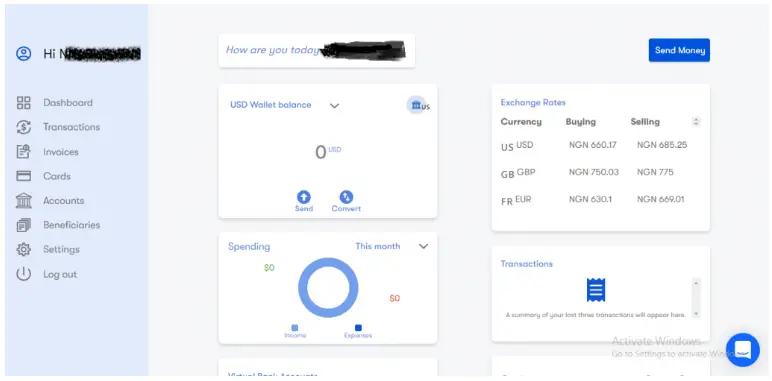
cheapest virtual dollar card in Nigeria
Geegpay will automatically process the correct code when you enter it and will then link you to your dashboard after it has been validated.
Your Geegpay account has now been successfully created.
The next step is to completely verify our account to make sure everything is working properly.
Step number 5: Go to Settings
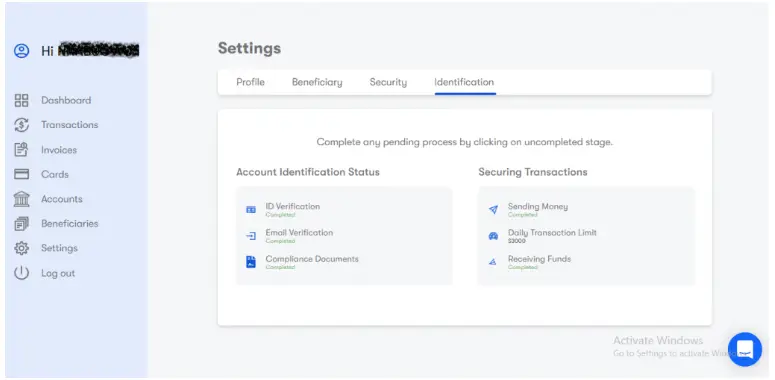
cheapest virtual dollar card in Nigeria
You will see four separate options under the “Settings” tab: “Profile,” “Beneficiary,” “Security,” and “Identification.” Let’s start by setting our “Profile” right now.
Profile
Make sure all of your information is accurate in the profile section. Enter your entire name in place of a signature and a legitimate phone number , birthdate, occupation, etc.
If you are using the account for yourself, you can select “Individual” under the “Contractor type” heading.
Enter your street name, city, state, postal code, and country in the “billing address” field.
Likewise, fill out the “Postal address” field. After entering your information in each section, be sure to click save.
Beneficiary
You can enter the bank account here that you want to use to withdraw money from your Geegpay account.
Additionally, you can add numerous beneficiaries by doing it one by one.
If you have a USD account in your home country, you can even withdraw your money in USD.
Security
You can use Two-Factor Authentication and a password to secure your account in this section.
You must download the Two Factor Authentication app from Google and use it to scan the code that appears on your screen in order to use the Two Factor Authentication security.
Identification
A legitimate document proving your identification is required in this situation.
While you are on the platform, you will be informed of the procedures you need to follow when doing this task.
Your identification will be confirmed in a matter of minutes if you properly follow the instructions, and you will then be able to access a screen like the one in the illustration below.
After completing account verification, you may use your dashboard to set up additional features that will make using this platform easier for you.
For instance, you may move on by setting up accounts in USD, GBP, and EUR.
According to past experience, your new USD account will be accepted immediately, whereas GBP and EUR accounts will require a few hours or days to be approved.
Step number 6: Create a Virtual Account
Locate “Accounts” on the left-hand menu and click on it to start creating a virtual account.
Click “Create an account” on the page after it has opened. You will then be directed to another page where you may choose the kind of virtual account you require.
You can select your preferred currency from the drop-down box; the available options are USD, GBP, and EUR.
After making your choice, click “Create” to start the process of creating your new account.
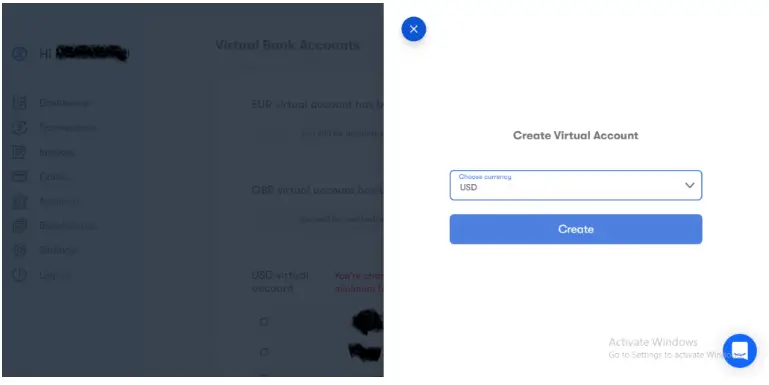
cheapest virtual dollar card in Nigeria
You would be given all the information that a USD account would have, for instance, if you created a virtual USD account.
You can receive money from your clients who are located in the US with the use of these details.
An example of the information you will have in your USD account with Geegpay is shown in the image below.
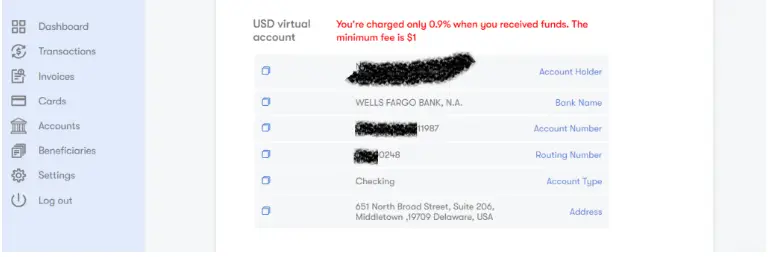
Using the information from your USD account, as displayed above,
You can even transfer money directly from your PayPal, Wise, or Payoneer account to your Geegpay account, where it will be converted at the greatest conversion rate into the local currency of your country.
Step number 7: Creating a Card
We advise you to create a virtual card if you want to use it to make online purchases or if you intend to link it to your PayPal account for quick withdrawals.
Navigate to “Cards” and click on it to begin. Then select “Create New Card.”
You should input your name in the “Alias” box under the “New card” option (probably the name you want to be displayed on the card as the name holder).
Next, select the type of card as you are writing, Geegpay online issues virtual cards.
However, it’s likely that they will provide actual cards to each user in the future who wants to use an ATM to withdraw money.
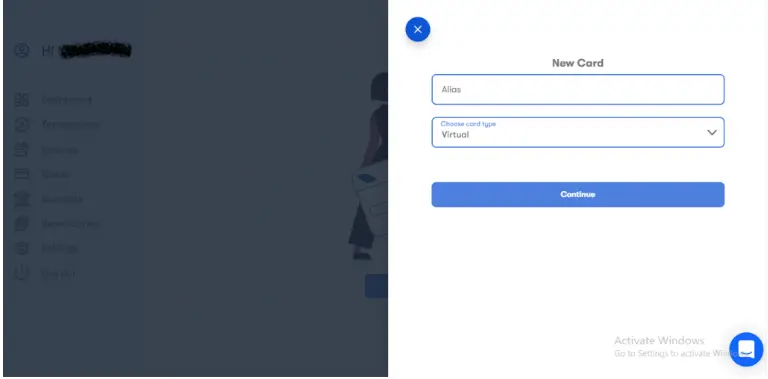
cheapest virtual dollar card in Nigeria
To continue creating your virtual card, click “Continue.”
You’ll see that Geegpay charges $3 as a virtual card fee on the following page.
You will enter the amount you want to credit to the virtual card you are generating in the other fields that you can see on your screen.
You will also select the wallet from which you want the $3 to be taken from.
You can even Request for Loan
You can use the “Loan” feature when perusing the services Geegpay provides its consumers if you want to use this platform to get a loan.
You should also be aware that loan applications are subject to interest charges.
The amount of a loan you will be eligible for in your account is depended on how effective your account is and how much money you have received in your account since the account was first opened.
Conclusion
We went through every step you must take to create and validate your Geegpay account in detail.
You may quickly register and validate your Geegpay account by following the simple steps we provided.